 Hand soldering Surface Mount Devices (SMD) scares a lot of builders, but it is easier than what it looks like. Even sometimes, it’s easier than soldering classic Through Hole Components. Really!
Updated on March 24th, 2021
The Tools
Any soldering iron can do the job. No need for an expensive, specific, tiny tip. I personally use 1 or 2mm wide tips. One thing though, the tip must be shiny clean.
Also conical tips must avoided. I recommend chisel/screwdriver type tips.
If you have a regulated iron, set it accordingly to the melting point of your alloy (check its data) and add at least 10 or 20°C (depending on the heat capacity of your iron tip, you might need to compensate by increasing the temperature).
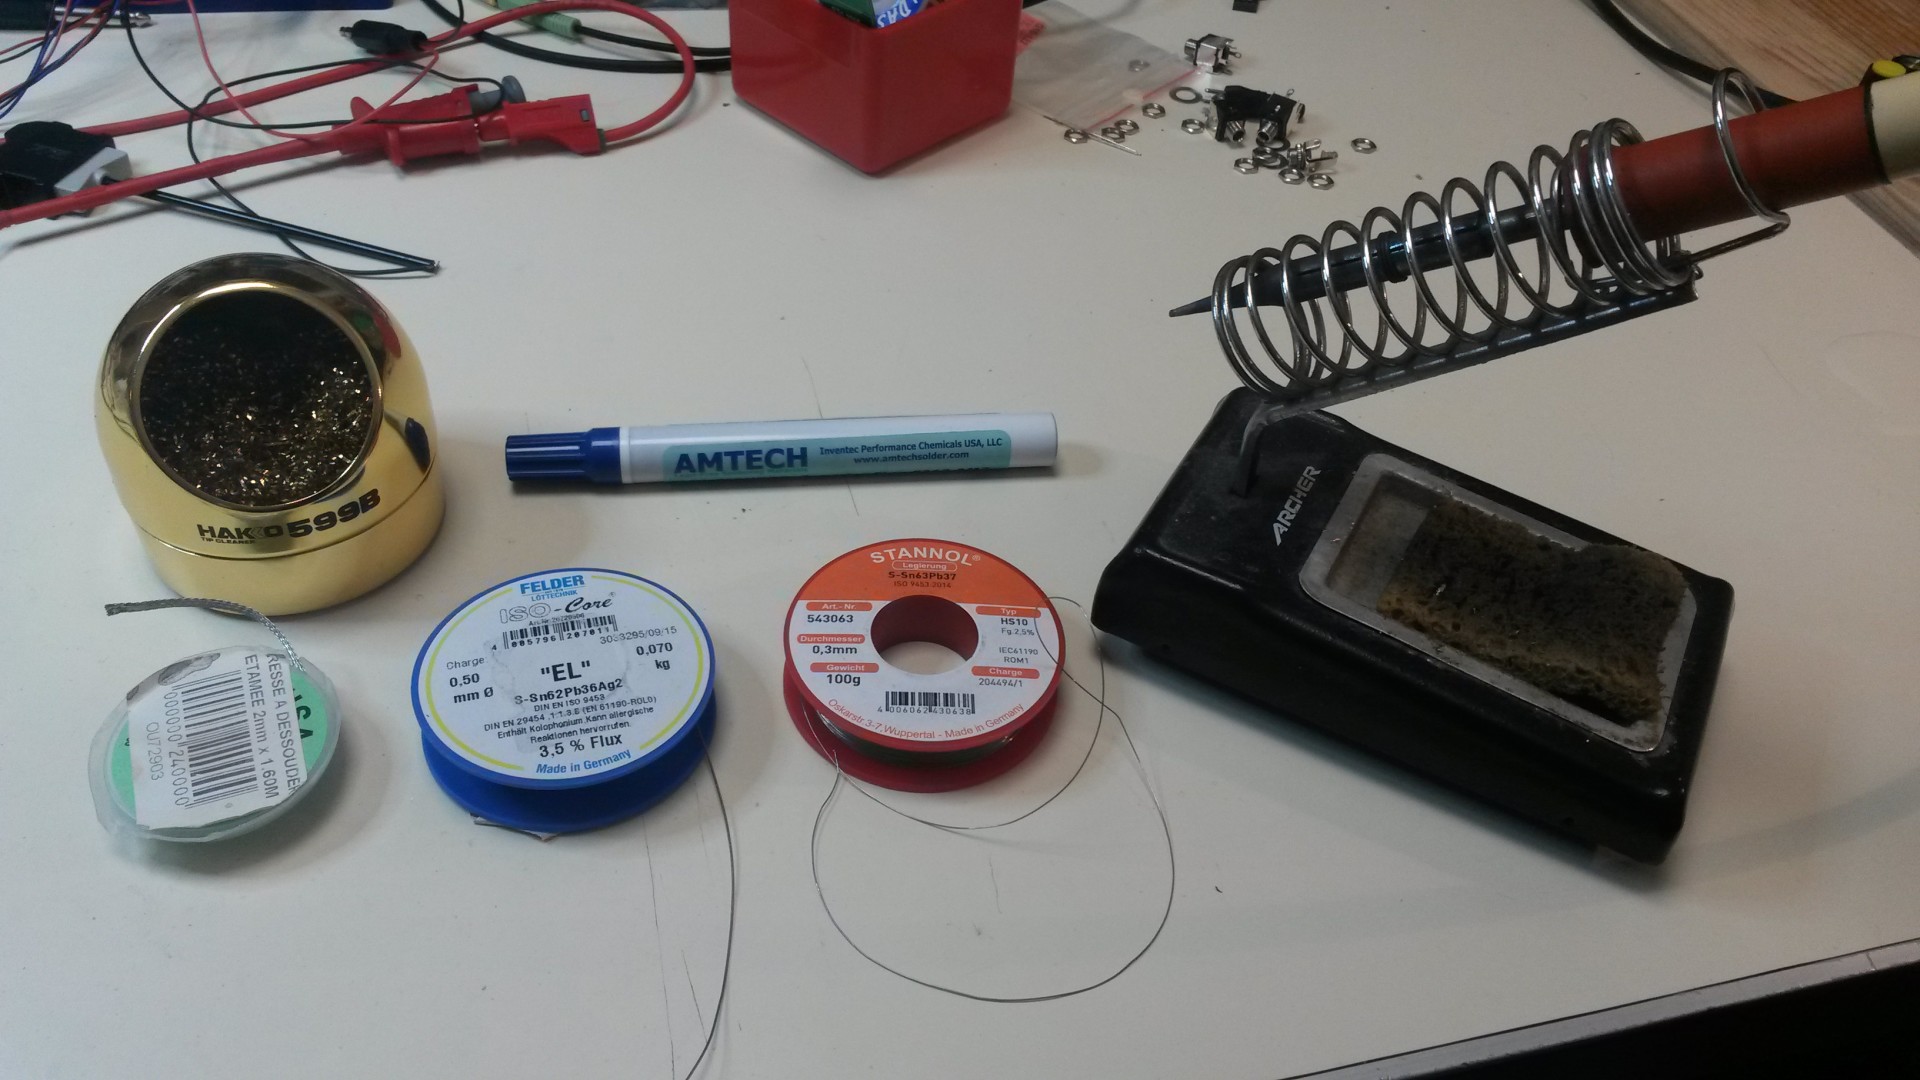
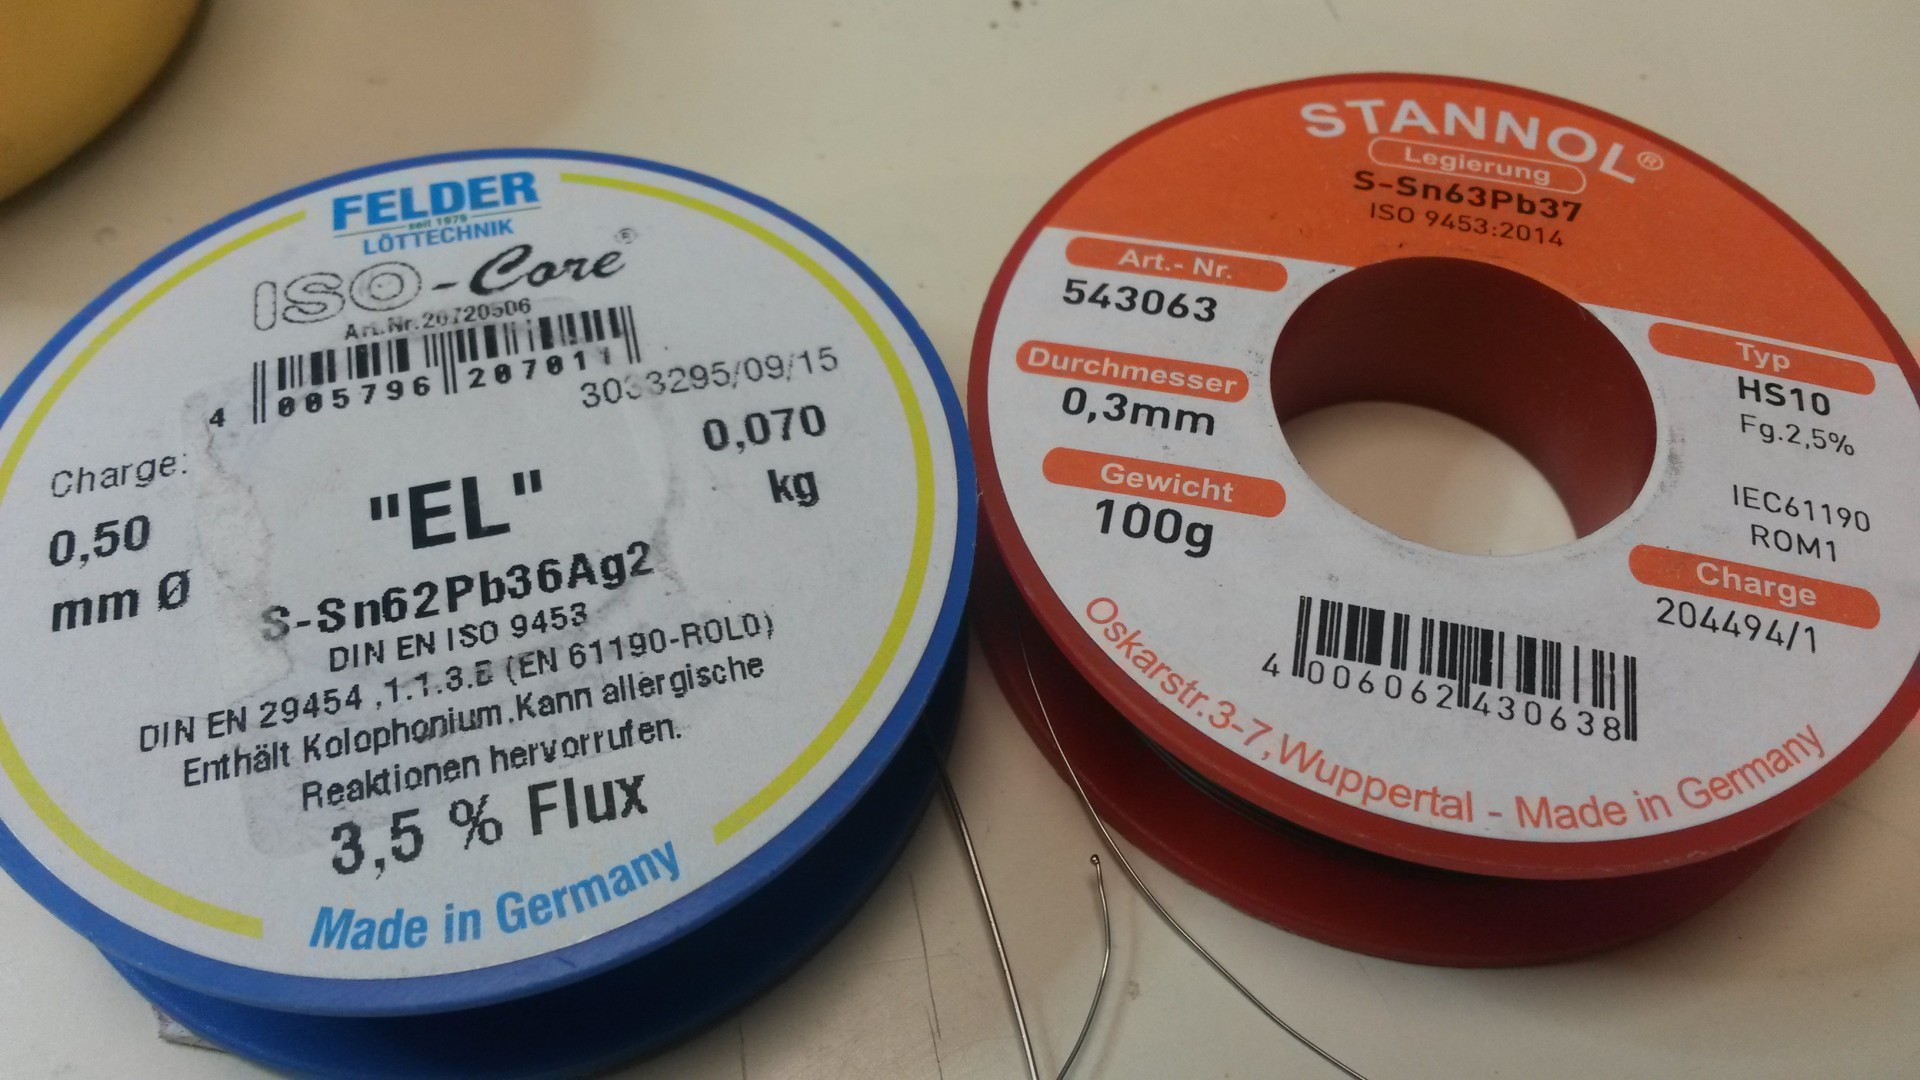
Leaded solder wire is easier to use. Unfortunately, it now complicated to source it.
Sn60Pb40 is ok, Sn63Pb37 is better. My favorite alloy is Sn62Pb36Ag2.
Be careful with cheap solder alloys. I saw really ugly results caused by dubious products. Solder wire is expensive. Particularly for thinner diameter wires.
Your solder wire must absolutely include a flux core. Several degrees of corrosiveness exist. “No clean” and “low spatter” is also preferable.
How to maintain a component in place
Through Hole (TH) components are naturally kept in place thanks to their legs, while of course Surface Mount Devices (SMD) just sit flat on the PCB, only waiting for the slightest shake to fly away. And, as small and lightweight they are, they fly pretty well, and pretty far away!
My first tryouts were disastrous, usually sadly ending with a deep fried resistor, stuck on my iron tip…
So, we must keep the component held in place, without the need of a third or fourth hand.
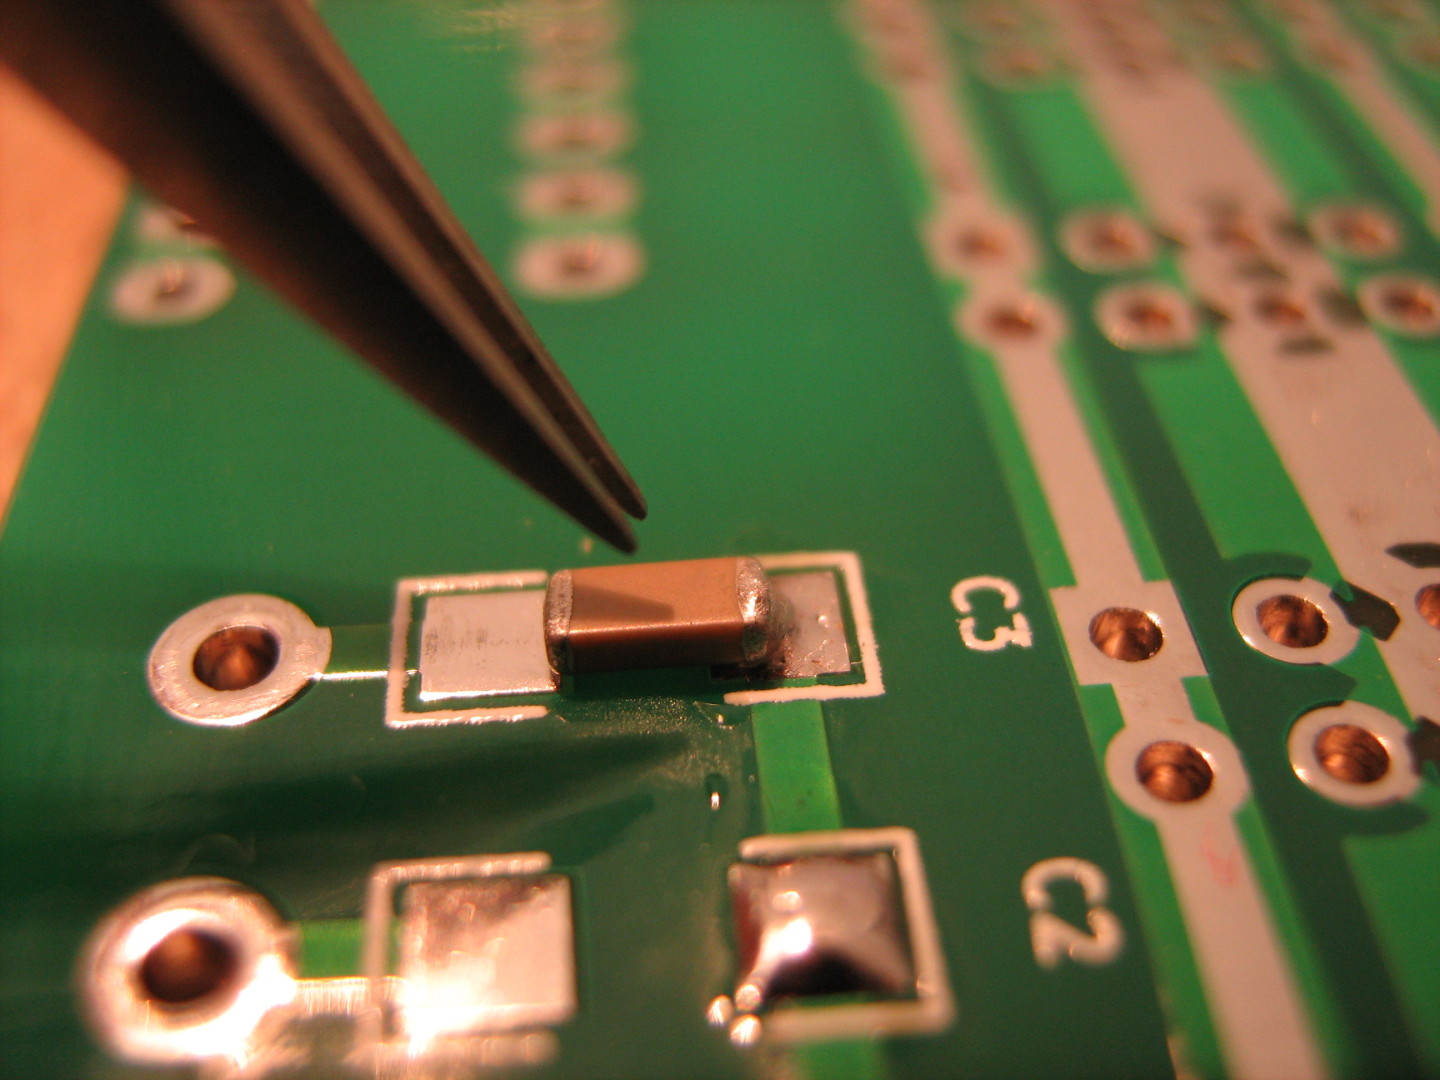
The method I use with great success is a two step job: first put a small amount of solder on the PCB.
Then, with fine tweezers in one hand and your soldering iron in the other, place the component over its footprint’s pads.
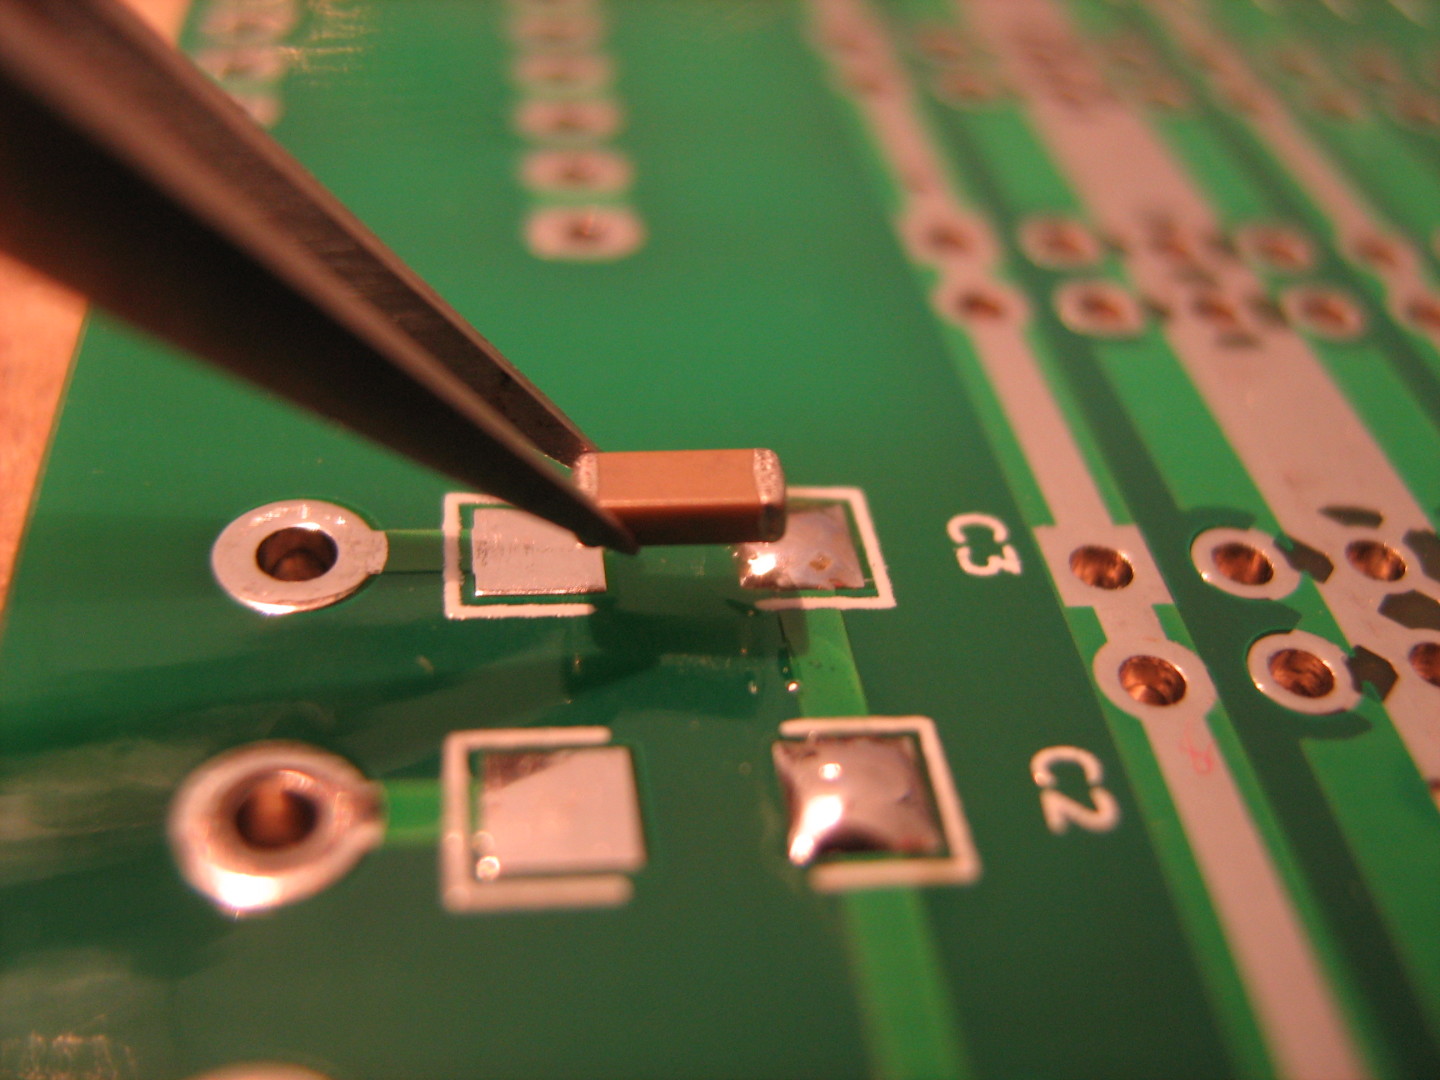
When you’re ready, while maintaining the component with the tweezers, place your iron tip in contact with the solder blob. The heat will melt (“reflow”) the solder which will “soak” on the component’s pin.
When the solder cools down, the component is kept in place. You have one pad done. Congratulations!
If you’re not satisfied with the overall positioning of the component, don’t panic. You can move the component again by melting the solder while dragging the component with the tweezers. This can be repeated several times. At one point though, the solder joint will be dull, and won’t flow correctly. It’s because the flux has been totally burned. If you have a flux dispenser (pen, syringe…) you can apply some. Or wait ’til the last step below.
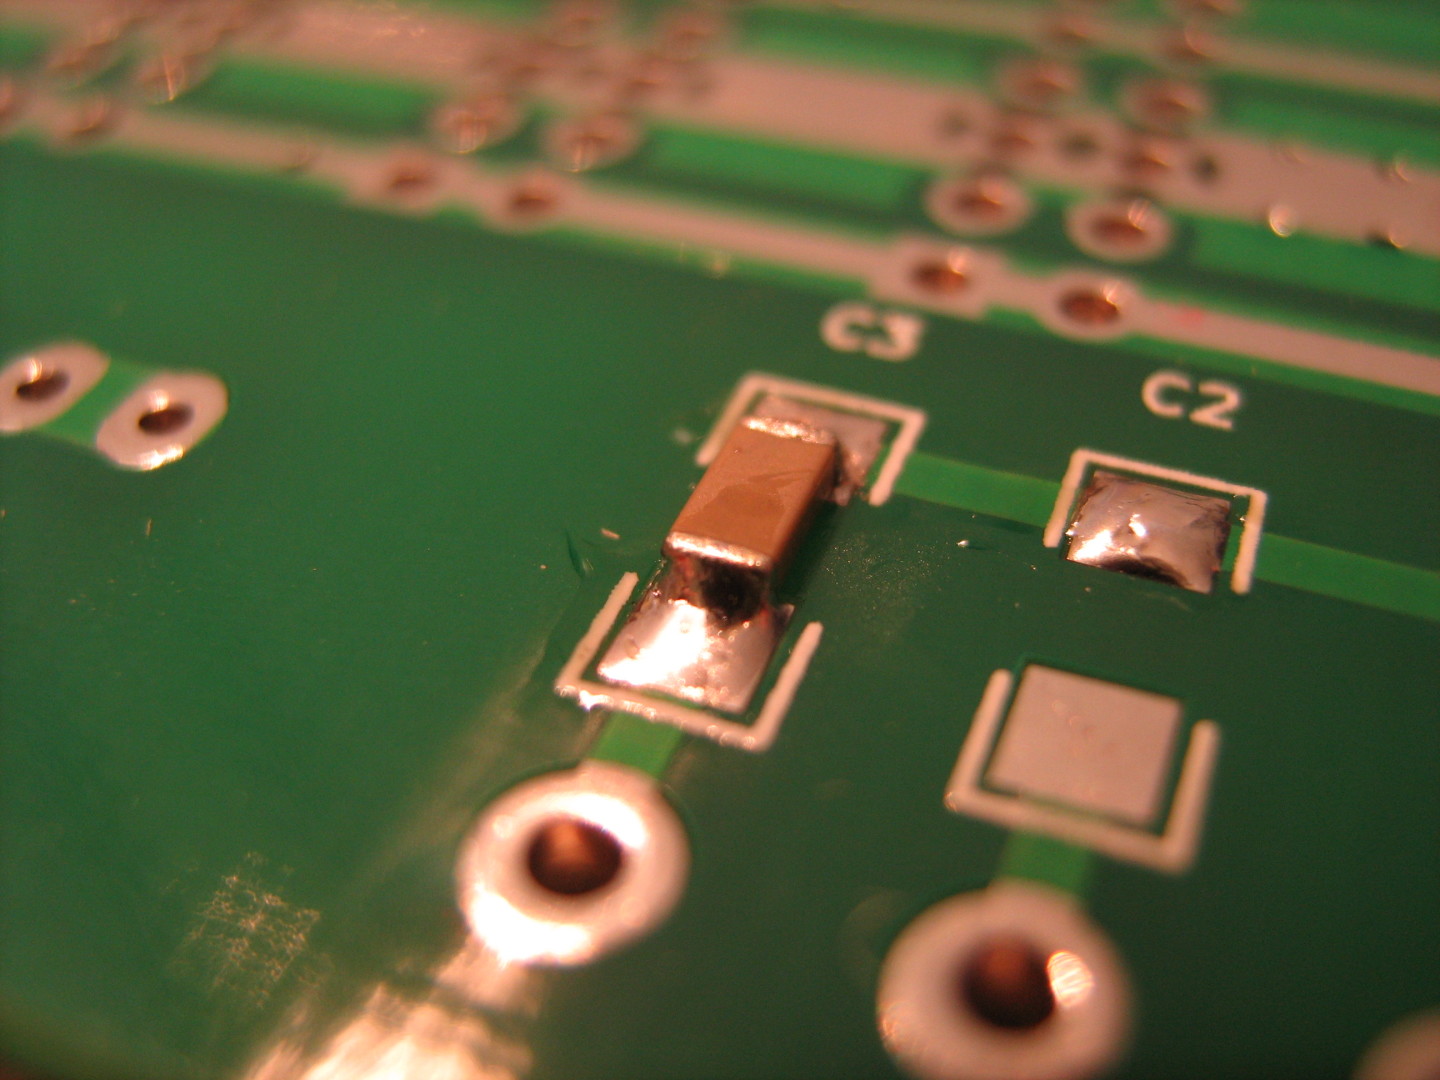
At this stage, you need to check that the component is correctly oriented, and sits flat on the PCB. If there’s any angle, you need to correct the position now.
When the position is correct, it’s time to solder the second pad.
The Other Pads
Now it’s time to solder a second (or more) pad. The technique is more traditional: the solder wire in one hand and the iron in the other.
As you would do with Through Hole components, apply first the heat to both the pad and the component’s pin and then supply a tiny amount of solder.
Surface mount components are tiny and require less heat than their bigger through hole counterparts. You can damage them badly if you let the iron tip in contact too long on the pins.
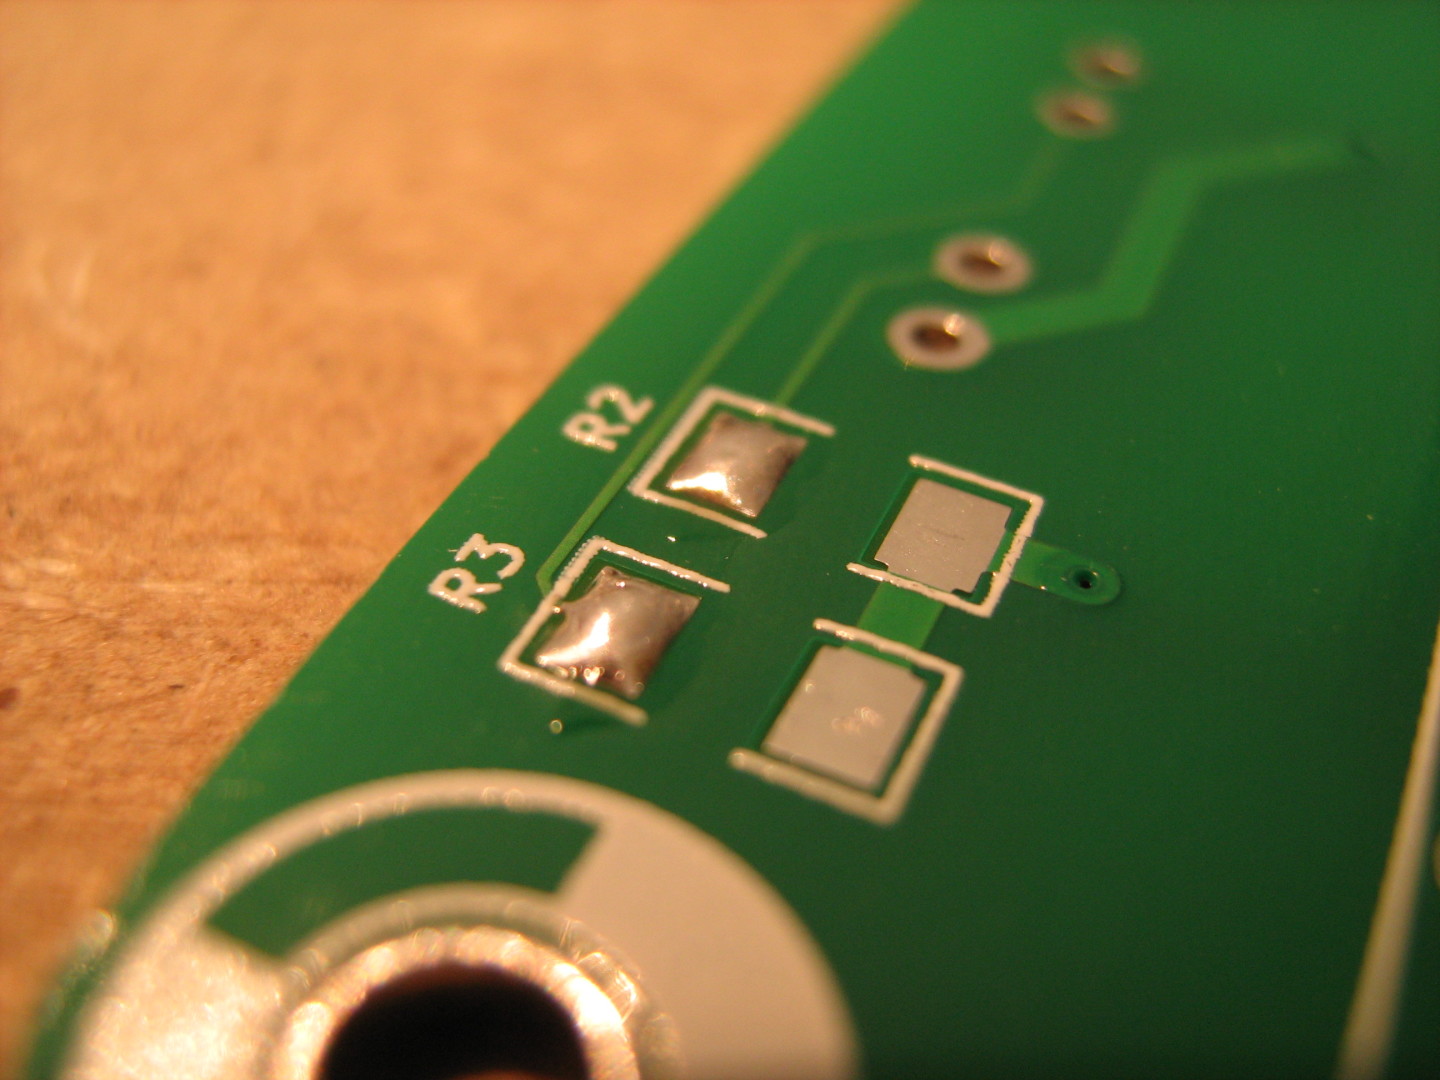
Be extremely careful with the PCB pads themselves. You can damage the copper pad if you apply both too much heat and pressure. Do not force!
SMD Pads are small and require less solder tin than for TH pads. The solder joint should be concave (not bulging) and shiny.
In case you put too much solder, use a tin plated de-soldering braid/solder wick.
If you want to solder components with more than two pads or legs, this technique also works very well, as long as you have access to the component pads. You can’t solder BGA or QFN for example. SO, SOIC, SSOP, TSOP, TQFP and so on are ok.
Last Check
You need to check for solder bridges. They happen easily on SOIC and smaller packages. To remove a solder bridge, your iron tip must be perfectly clean (use a slightly wet sponge to remove any solder). Then, reflow the solder pads where the bridge occurred. As the solder tend to flow, it will migrate to your iron tip. Clean the tip again and repeat until the bridge has been removed.
Using some flux here can help a lot.
If the bridge is too important (too much solder), use solder wick.
When the remaining pins are soldered correctly, it can be a good idea to slightly rework some of the first pads.
As we soldered them in two steps, chances are that the quantity of flux was insufficient and the resulting solder joint isn’t as good as it should be. A good solder joint is concave, the solder must has flown and wet both the pins and the pads and the surface finish must be shiny.
If it’s dull, forms a kind of crispy blob, etc, then you must correct the joint.
To correct this, apply some flux (pen, syringe etc) and reflow the solder joint. Easy.
As a matter of fact, flux makes things a lot easier.
Enjoy!
Now this may need a lot of patience and concentration.. So which soldering brand do you use?
The brand doesn’t really matter. For SMD hand soldering, the most important are the alloy, the flux and the diameter of your solder.
Stay in leaded solder alloys if you’re beginning. Target the alloys that melt at 179°C or 183°C. The alloy itself doesn’t produce fumes. The flux does. But if you use leaded solder, wash your hands! Do not get your fingers to your mouth!
The core flux needs to be in sufficient quantity and of no-clean type. Rosin fluxes are ok. Don’t breathe the flux smoke!
The diamater is important to do a clean soldering job. Don’t go over 0.5mm. 0.3mm is perfect.
Thanks for a simple advice!
I tried to solder yesterday a GSM kit and got a couple of nasty solder “bubbles”, and also not sure if fried any of the components.
Bubbles are produced probably by your flux. I don’t know if you burnt your components. Some are really tough. It depends mostly on the temperature of your soldering iron and the time you let it in contact with the pads.
Bubbles can be the sign of a too big solder diameter. Too much solder. Some fluxes produce more brown remains as others. Rosin based fluxes for instance.
Thanks, David.
Will pay attention next time.
I know this is an older thread…..For not to much money, less than $100, you can get a decent hot air station for SMD work. I paid about $50 for one of the ones I have here and it makes SMD work so much quicker and easier. I work with a lot of 1/8th watt resistors that are about a mm or 2 long and this makes things much easier.